
Did you know there’s a setting for the reference WebP image encoding library (libwebp) that noticeably improves image quality without increasing the file size? It’s safe for batch conversions and its only downside is that it consumes additional processor time during encoding.
The lossy WebP image encoding format is renowned for the tiny file sizes it produces and not its excellent image quality. The format is ten years old , has been in all leading browsers (except Safari) for at least five years, and will finally arrive in Safari 14 (due for release later .)
I’ve used the format as a progressive enhancement here on Ctrl blog for the last four years. Web browsers that have supported it have been able to save some bandwidth by downloading the smaller WebP image files while older browsers have fetched larger JPEG and PNG files instead.
I’ve been mostly happy with the format over the years — except that it tends to ruin some illustrations. For some images, WebP images would turn some thin contrast lines, edges, and gradients to mush. I’ve resorted to using PNG and lossless WebP for these images; something which produces unnecessarily large files where a lossy encoding should have been enough for the job.
I stumbled upon an option called sharp YUV in libwebp. To cut to the chase straight away, enabling this option improves the visual quality in the situations mentioned above — all examples of chroma-subsampling that darkens and desaturates color — at no cost to the file size. The only documentation available for the option is these two sentences:
Use more accurate and sharper RGB->YUV conversion if needed. Note that this process is slower than the default ‘fast’ RGB->YUV conversion.
Here’s a test image designed to exaggerate the visual differences of the different chroma-subsampling options:
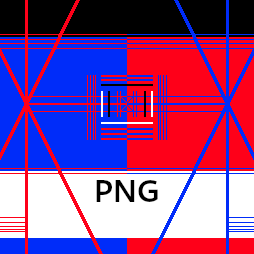
Test image (lossless PNG)
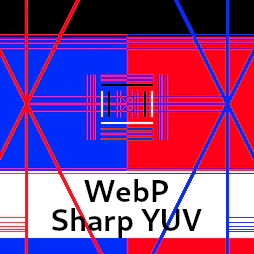
Animation alternating between WebP with sharp YUV and the default YUV subsampling.
Without the sharp YUV option, the thin lines get desaturated and a bit blurry. Enabling the sharp YUV option performs gamma-correction to preserve the color contrast closer to the original color. It also preserves the thin lines under more conditions. The gamma-corrected color still bleeds the blue color into the red color and vice-versa. However, this effect is inevitable in a chroma-subsampled lossy image format.
But what about real-world illustration and photos? This blog has some 600 high-resolution 16∶9 aspect-ratio images that I encode in six different sizes from 96 px to 1088 px wide (3600 images in total.) I compared my lossless source images PNG (ZopfliPNG) and lossy JPEG (MozJPEG) images to their corresponding lossless WebP and lossy WebP images.
The test images were encoded with the default settings for their library but options for processor utilization were cranked up to the maximum setting (spend more time for higher quality and smaller files.) Instead of a fixed quality setting, each lossy image was encoded multiple times until they hit a target structural dissimilarity (DSSIM) value of 0.0025 using Kornel Lesiński’s excellent dssim library. The images should have similar visual quality across image formats and encoding options.
The lossy WebP image file sizes were 1–0,3 % smaller with the sharp YUV option than without it compared to the reference image encoded with the same DSSIM. The lossless WebP image file sizes was 0,3–0,1 % smaller with the sharp YUV option. This last one is quite surprising as it shouldn’t have any effect on the lossless encoding. There is a tiny positive file size reduction overall with the sharp YUV option but it’s insignificant. Notably, both variants of the WebP encodings ended up using the same quality settings (around 91) and the sharp YUV variant only saw a negligible improvement in their DSSIM value. It would seem that DSSIM can’t properly account for the color differences.
In my tests, encoding with the Sharp YUV option added took on average 68 % more wall-clock time per image. Your mileage may vary considerably depending on processor speeds and capabilities. While this may sound like a lot, keep in mind that WebP image-encoding is already incredibly fast. In my opinion, the quality gains are well worth the one-time extra time expenditure.
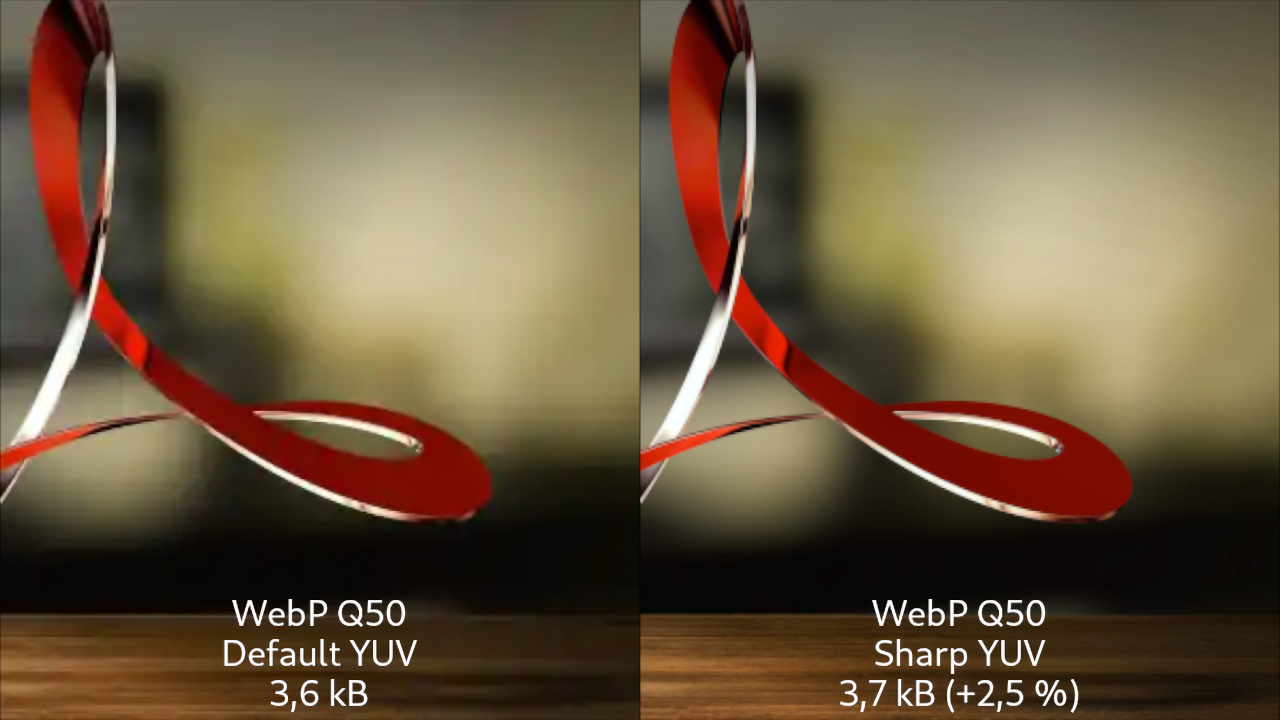
For the sake of completeness, I also tried encoding all of the images at a lower fixed quality setting of 50. The median image file size with the Sharp YUV option enabled increased by 2,6 % and the 85th percentile by 2,5 %. This produced the impressive result (upscaled to emphasize the differences) used as the feature image (high-resolution version) at the top of the article.
The conclusion is clear: if you’ve got the processing power to spare, then enable sharp YUV. You can enable it by passing the -sharp_yuv argument to the cwebp command-line utility; or toggling the use_sharp_yuv option if you use another utility based on the libwebp library.